EUR | €
 SEK | kr
 NZD | $
 CAD | $
 EUR | €
 AUD | $
 USD | $
 GBP | £

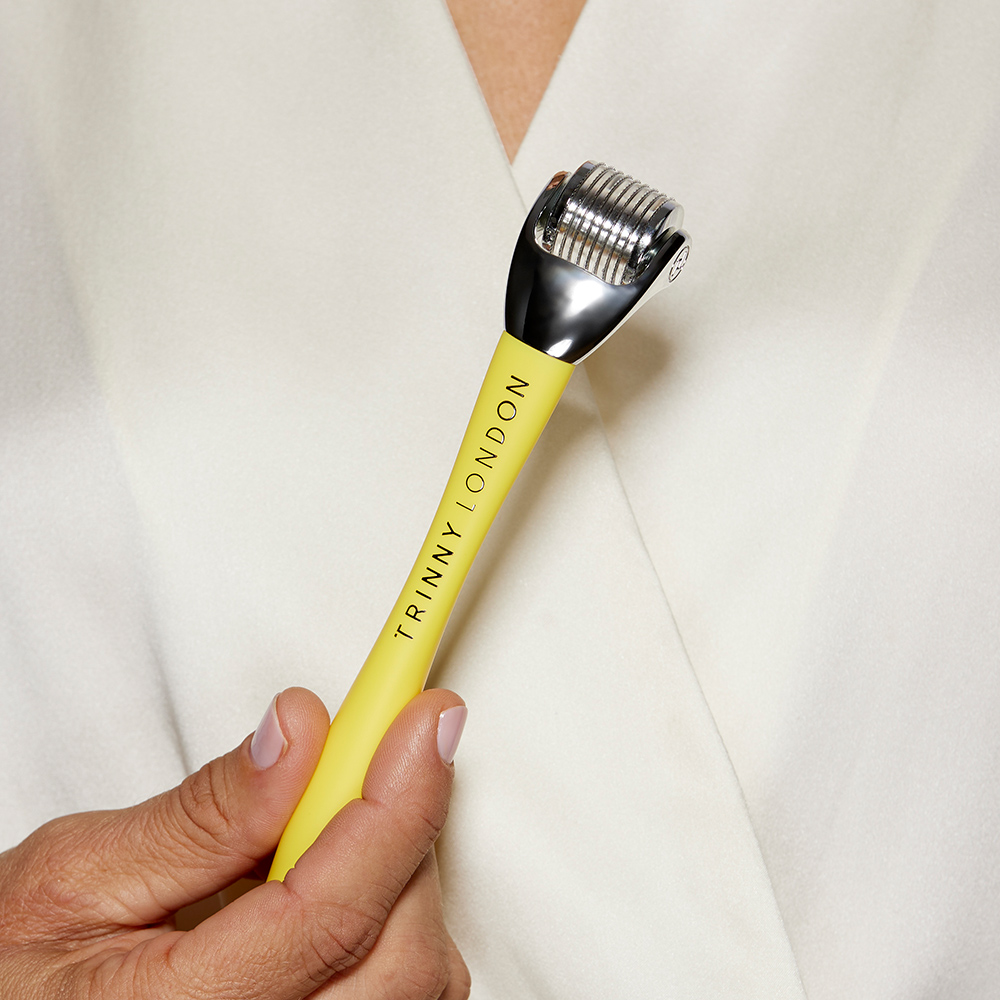
Skincare tool
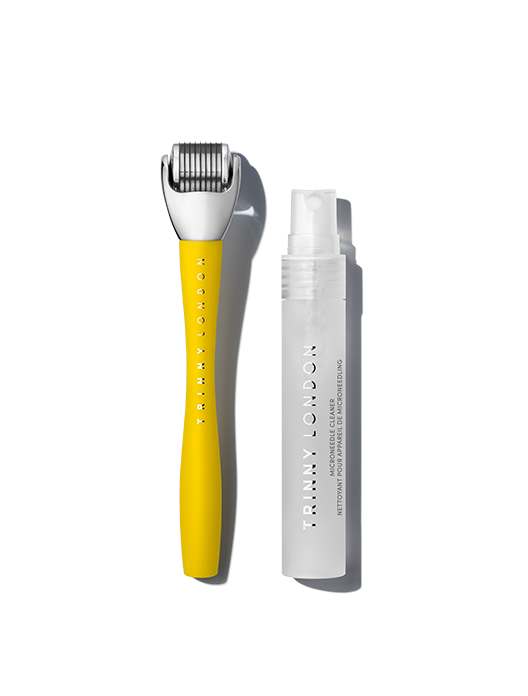
Plump Up Microneedle 0.5mm
At-home microneedle tool for firm, smooth skin
Thoroughly double cleanse your skin, then rinse the microneedle with warm water and shake off any excess
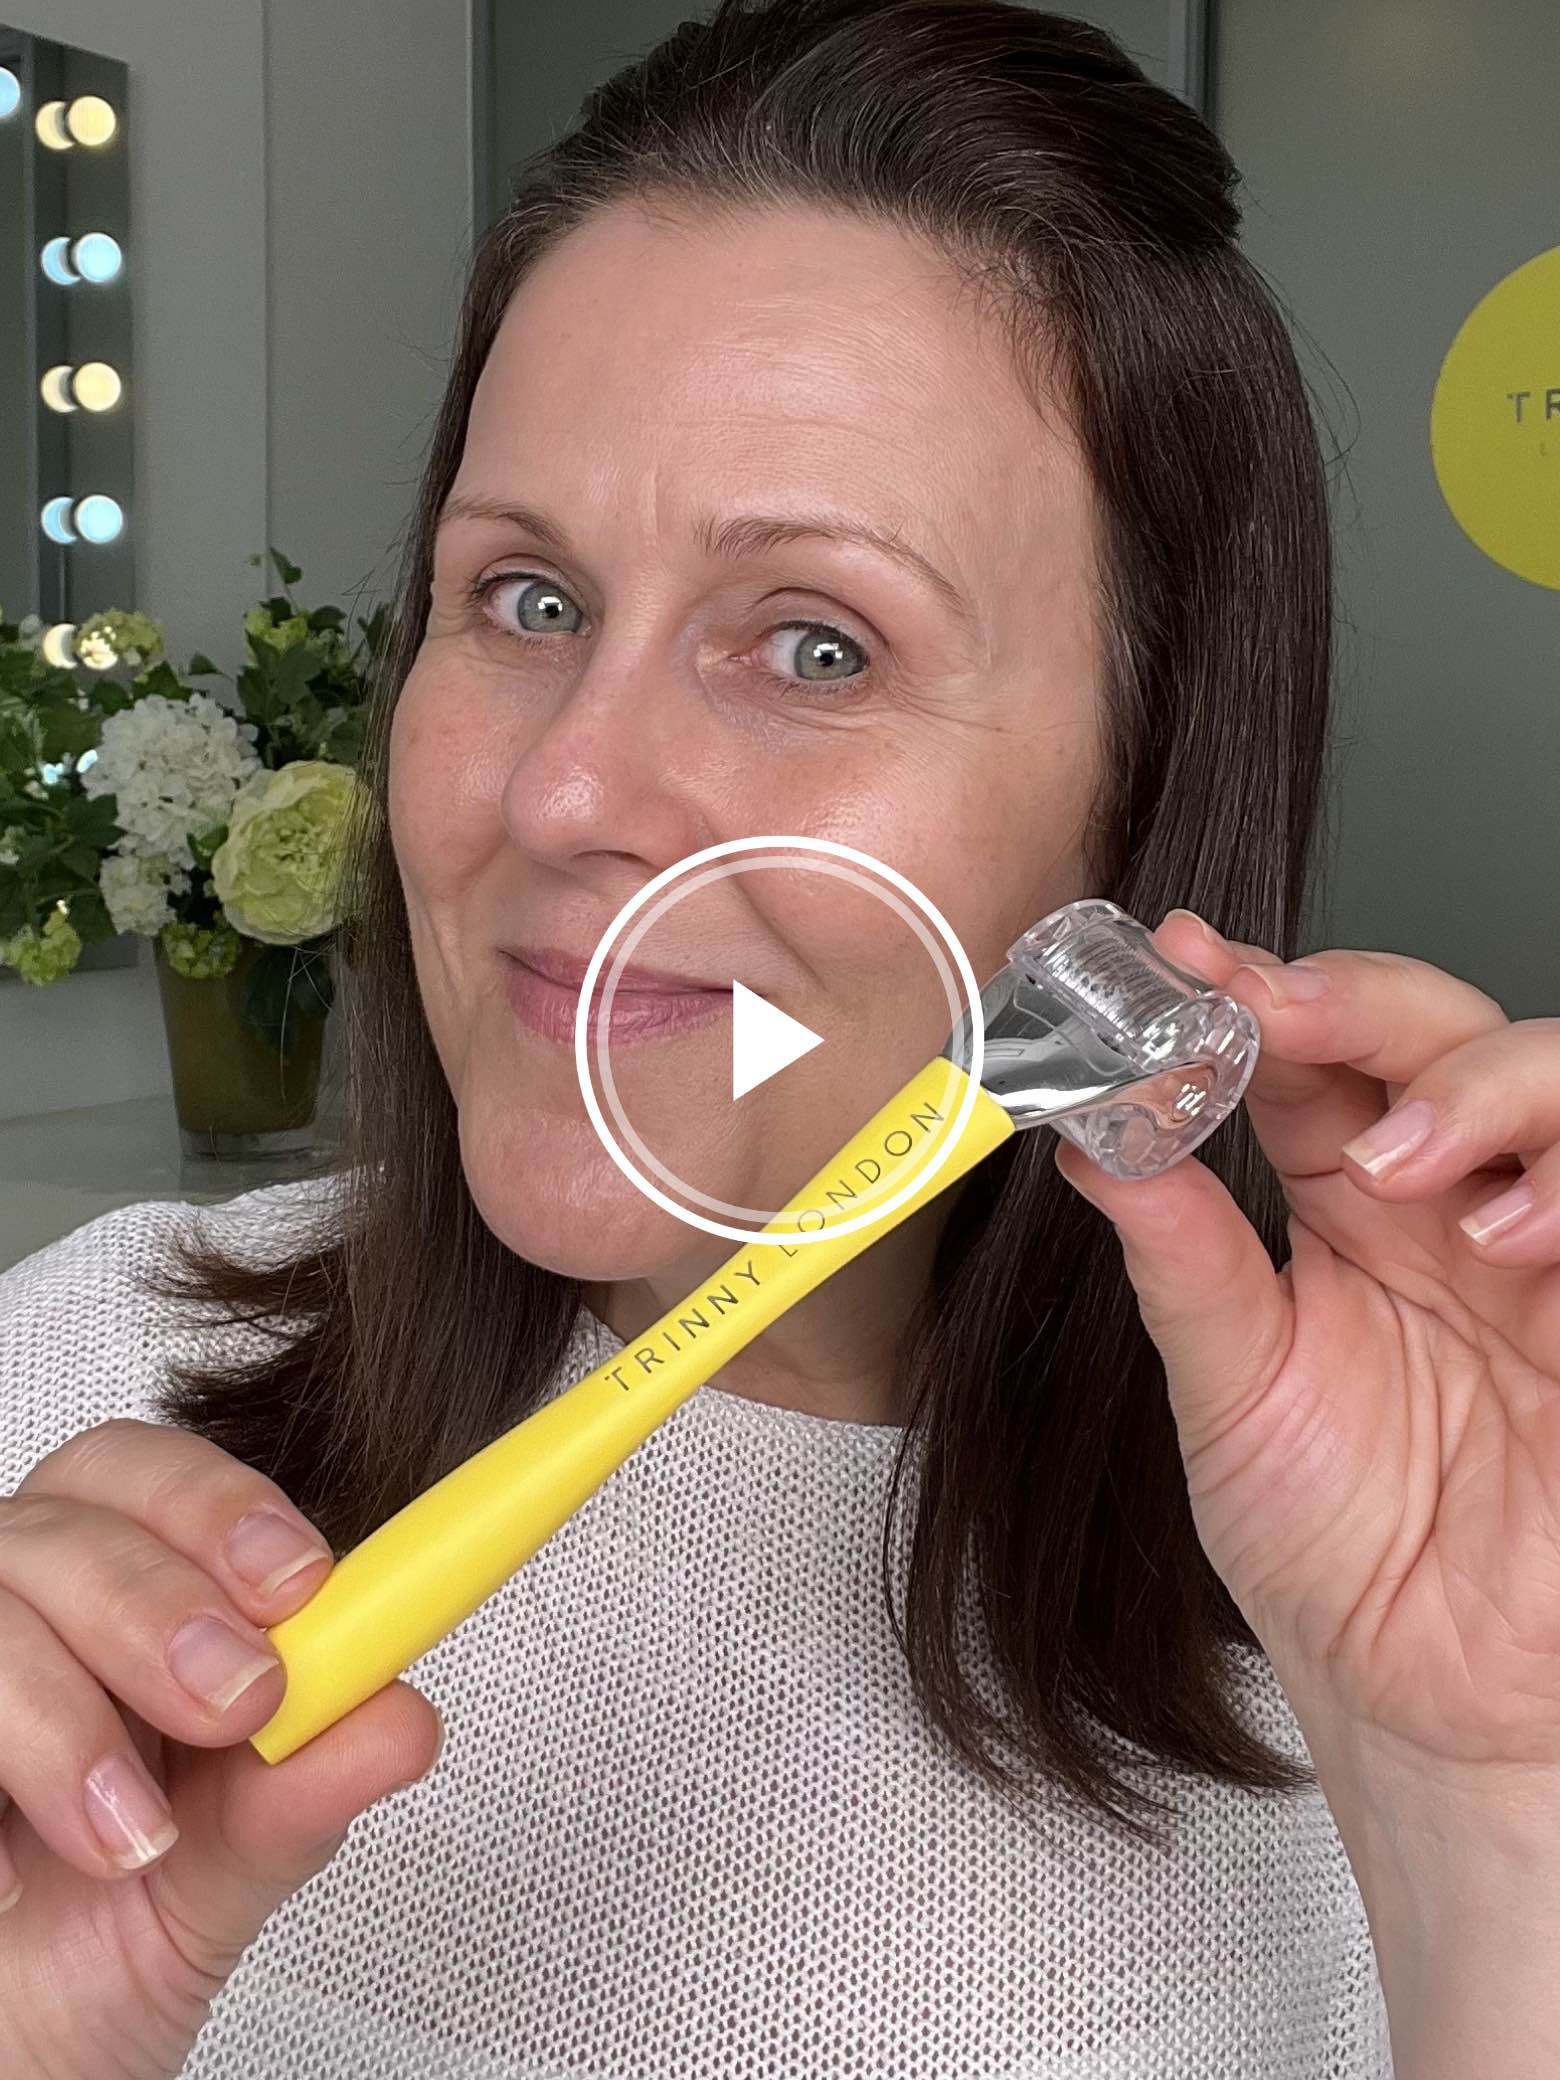
Hold your microneedle at the base with your index finger resting on the handle for stability
Working in small sections, roll your microneedle back and forth, twice horizontally and twice vertically, per area – use light, feathering motions and don’t exert any force or pressure
This technique should be used on your forehead, cheeks, chin, neck and décolleté – take extra care on areas where the skin is thinnest, such as your forehead and neck, and never microneedle on the eyelids
To microneedle your nose, pass the microneedle downwards twice on either side of the nose
Microneedle above the lips by moving the microneedle outwards from above the Cupid’s bow to the corners of the lip – do this twice on each side
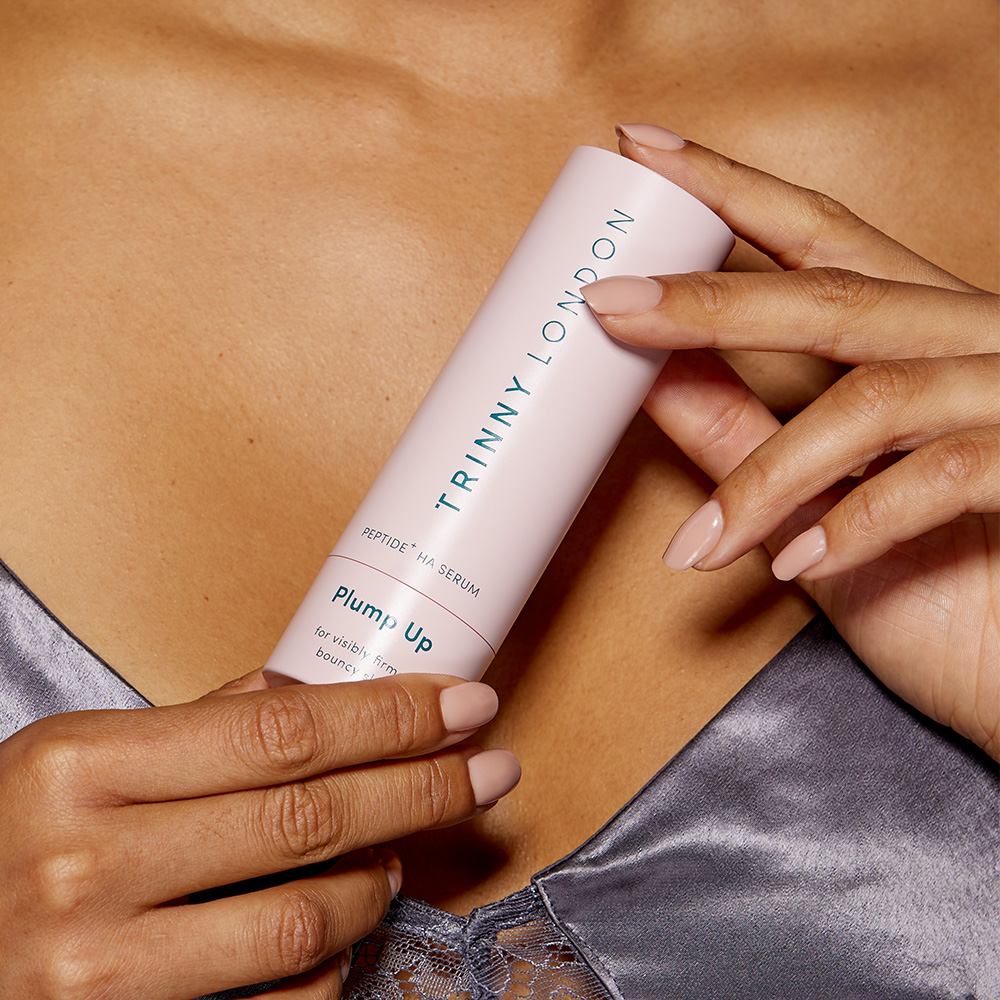
Apply a hydrating serum like Plump Up, our advanced peptide and hyaluronic acid serum
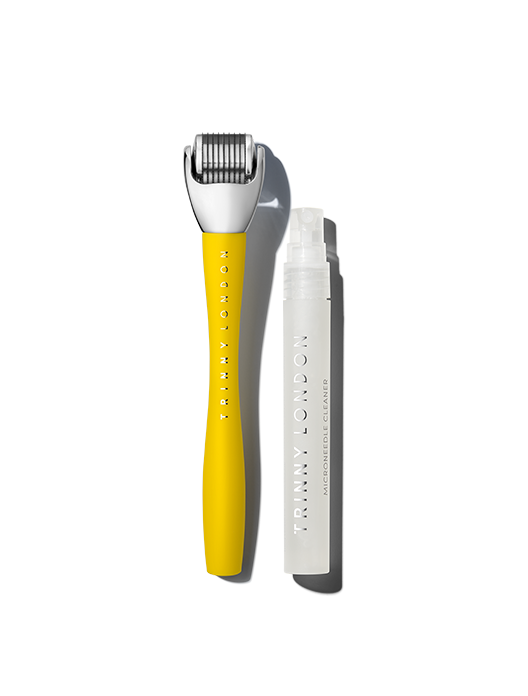
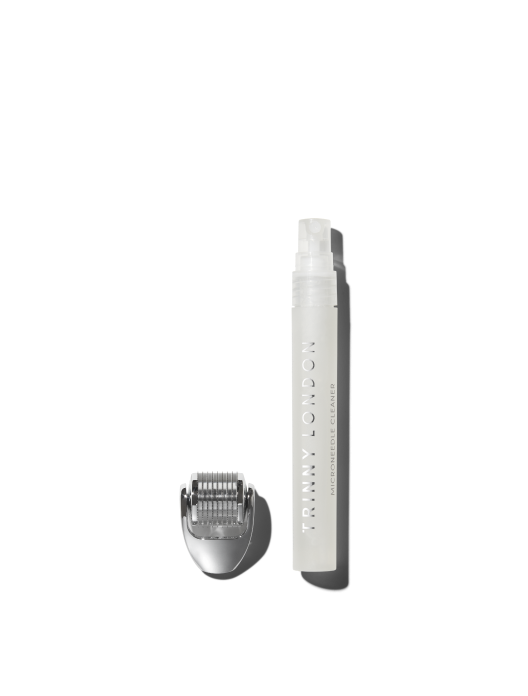
Spray the microneedle with the cleaning spray and replace the protective cap after every use
Ever wondered about the merits of at-home microneedling? What does it do? How does it work? We know that a roller wheel full of tiny needles may sound intimidating but fear not – microneedling is a minimally invasive way to achieve huge results (the kind typically reserved for pricey in-clinic treatments). A microneedle uses teeny-tiny, super-fine needles to create microchannels on the surface of your skin – this increases collagen production, supercharges the effects of your serums, and improves the appearance of fine lines, wrinkles, pores and acne scars. With a microneedle in your arsenal, smoother, plumper skin is only ever a roll away. Here’s everything you’ve ever wanted to know…
Microneedling involves using a roller wheel dotted with tiny needles (we’re talking less than a millimetre) to create microchannels on the skin's surface – think pinpricks rather than punctures. This process works to rejuvenate your skin by boosting collagen production, and Skin Expert Fiona Brackenbury explains that the benefits are two-fold, “Short term, these microchannels aid and enhance the absorption and benefits of your skincare. Long term, microneedling improves skin texture, fine lines and wrinkles.” And no need to wince, at-home microneedling isn’t painful either – the bark is truly worse than the bite.
Microneedling is so effective because your skin is incredibly clever. “Skin is constantly in defence mode and repairing itself, especially when you go to sleep,” explains Fiona. Microneedling simply makes the most of your skin’s intrinsic talents. “Microneedling creates a microchannel, we’re not going deep, we’re not drawing blood. This encourages the skin to respond and react, but you’re not injuring the skin or drawing blood,” says Fiona. Instead, these microchannels trigger your body’s natural healing process, sending a signal to your skin to produce more collagen and quickly seal up these teensy pinpricks. The result? A smoother, plumper, firmer complexion. And thanks to all of that collagen production, microneedling also helps with fine lines, wrinkles, pores, and acne scarring. “There’s just a real energy and glow to the skin – like it’s lit from within,” says Fiona.
Not all at-home microneedles are created equal, and the main thing to consider is needle size. ”For beginners, a 0.3mm needle length is perfect,” says Fiona. “Once you’re ready to take things up a notch, you could opt for 0.5mm – these are clinically proven to improve your skin and will make a real difference.”
Some microneedles also come complete with a skincare routine or a specific serum to apply afterwards and really supercharge those skin-plumping benefits. You might also want to consider a microneedle that has a replaceable head, so you don't have to toss the whole thing away when the needles start to blunt – Fiona suggests replacing your microneedle head every 24 uses because dull needles can damage the skin.
Microneedling can benefit all skin types, but those with sensitive or blemish-prone skin should be mindful. “You should avoid microneedling if you have acne or even if you have lots of angry inflamed breakouts as this spreads the bacteria across your face,” explains Fiona. Instead, wait until your skin clears up before giving microneedling a try. Those with sensitive skin or a compromised skin barrier should also approach with caution. “It’s better to focus on strengthening the skin barrier before trying microneedling,” Fiona advises.
Avoid facial treatments (such as waxing, peels and injectables) a week before microneedling.
Avoid using the microneedle on the same night as your retinoids (retinal, retinol etc), alpha-hydroxy acids (AHAs) or vitamin C. Use them on alternative nights, leaving at least 24 hours in-between.
Do not microneedle on skin that is sensitive, broken or has active blemishes.
Always prep your skin by double cleansing, “You want immaculately clean skin,” says Fiona. “With no SPF, dirt or makeup lingering behind.” You also need to make sure that your skin is dry and that you haven’t used any retinoids or exfoliants at least 24 hours before microneedling. “These ingredients can make your skin a little more sensitive,” Fiona explains.
Once your skin is clean, make sure your microneedle is sparkling too – just rinse it with hot water and shake off any excess. As soon as you’ve finished microneedling, always sterilise your microneedle with a few spritzes of a cleaning spray and let it air-dry before replacing the cap. Microneedling is also an activity best reserved for your night-time routine. “You want to have the whole night for your skin to restore and act accordingly,” explains Fiona.
Once you’re ready to roll, grab your microneedle and move it gently up and down, backwards and forwards, in small sections across your face. “You need to let the microneedle do its work and not press too hard,” says Fiona. “Be respectful to your skin and always listen to what it's telling you – if you feel any tingling or sensitivity, then it’s not the day for microneedling.” You should avoid delicate areas where the skin is thinner, like around the eyes and across the lips. Bony areas with less cushion, such as the forehead and nose, are also places to exercise caution.
Though the skin-plumping effects may be addictive, it's possible to go overboard with your microneedling routine. “Do not microneedle every day,” cautions Fiona. “You need ‘rest days’ otherwise you’re not giving your skin enough time to repair itself.” For the best results, you should aim to microneedle two to three times a week to allow full recovery between sessions. How do you know if you’ve overdone it? While a little pinkness after microneedling is normal and only temporary, if you experience redness, stinging, burning or extreme sensitivity, then it’s time to put the microneedle down. “If your usual skincare feels tingly or spicy 48–72 hours after using your microneedle, and it doesn’t usually, then that’s a good sign that you’ve overdone it,” says Fiona.
The microneedle needs to be cleaned after every use.
Spray the entire head with the microneedle cleaning spray from approximately 10 cm away until completely covered (no need to rinse off).
Replace the protective cap before storing.
Rinse head with warm water before every use and shake off any excess.
You need to be kind to your skin after microneedling and load up on skin-loving ingredients like hyaluronic acid. “Hyaluronic acid is your skin’s support system and gives that bounce and plumpness – hydration really is the foundation of youth,” says Fiona. Peptides also play nicely with microneedling. “Peptides aren’t irritating,” says Fiona. “They’re a real performance ingredient and give you that gorgeous, plump, healthy-looking complexion.”
And what should you swerve post-microneedling? “No exfoliating acids, no retinals and no vitamin C,” says Fiona. “These ingredients can irritate your skin, so always wait 24–48 hours after microneedling before using products that contain these.”
You’ll also want to avoid high heat or sweating before and after microneedling. “That means no saunas,” says Fiona. “Increasing the heat in your skin increases inflammation which can make your skin more sensitive.” Waxing is another big no-no. “It removes the top protective layer of skin cells which means you’re microneedling over fresh, sensitive skin,” Fiona explains. We’d also recommend taking at least a one month break after every eight weeks of microneedling to give your skin the opportunity to rest and regenerate.
Small but mighty, at-home microneedling can be a game-changer for improving your skin's overall quality and tackling stubborn skin concerns. Speedy, easy and pain-free, it’s the best way to bring in-clinic results to your bathroom. And as any microneedling devotee knows, the skin-plumping, texture-smoothing results will keep those compliments rolling in…
Stop microneedling immediately if you experience any pain, tingling or burning.
Pinkness in the skin is normal during microneedling and can continue post-treatment.
A microneedle should never draw blood.
Avoid exercise, hot showers or anything else that could irritate or inflame the skin for at least an hour pre or post-microneedling.
Avoid using the microneedle on the same night as your retinoids (retinal, retinol etc), alpha-hydroxy acids (AHAs) or Vitamin C. Use them on alternative nights, leaving at least 24 hours after microneedle.
If you drop your microneedle you will need to replace the head.
Your microneedle head should be replaced after 24 uses.
Do not share your microneedle with other people.
Store your microneedle in a safe place out of reach of children.
Shop the article
At-home microneedle tool for firm, smooth skin
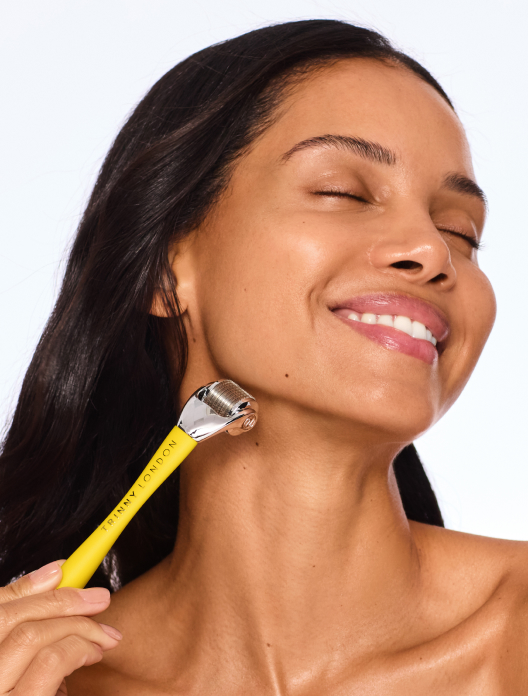
At-home microneedle tool for glowing, plump skin
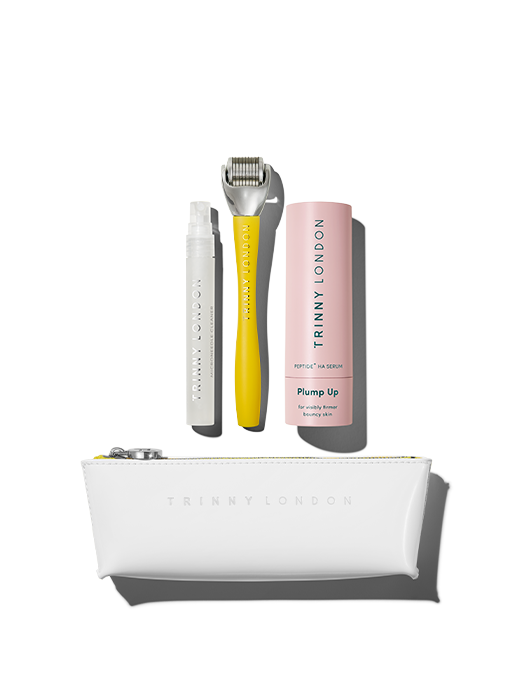
Microneedle, peptide serum and beauty bag
Everything you need to care for your Plump Up Microneedle